

How to Measure for Costumes: Performers & Parents Guide
Getting the measurements right before ordering or building a costume saves you from the single most common production headache: a garment that fits nobody. The essential measurements for most costumes are height, chest/bust, underbust, waist, high hip, fullest hip, girth/torso, inseam, outseam, sleeve lengths (underarm and overarm), shoulder width, neck circumference, head circumference, and shoe and glove sizes. Three rules govern all of them: use a flexible cloth or plastic sewing tape, work in one unit (inches for U.S. productions), and submit your true body measurements without adding ease. The designer adds ease. You do not.
Quick checklist before you start:
- Flexible sewing tape (not a metal ruler)
- Form-fitting clothing or undergarments
- A helper to hold the tape
- Pen and a printed measurement form
- One unit only: inches or centimeters, never both
Key Takeaways
Accurate costume measurements start with one rule: submit true body measurements in a single unit, with the measurer’s name and date on every form.
| Point | Details |
|---|---|
| Use a flexible sewing tape | Rigid or metal tapes cannot wrap body curves accurately; always use a cloth or plastic dressmaker’s tape. |
| Never add ease yourself | Submit true body measurements only; the costume maker applies ease based on fabric and design. |
| Measure twice for key dimensions | Re-measure chest, waist, and hips; readings that differ by more than half an inch need a third check. |
| Label every field with its unit | Write “in” or “cm” on every form field; unlabeled numbers cause sizing errors at the shop. |
| Toylandeu™ for costumes and craft supplies | Browse cosplay costumes and DIY craft kits at Toylandeu™ with free worldwide shipping and customer support for fit questions. |
Table of Contents
- What do you need before you measure for costumes?
- How do you measure each body part accurately?
- How do you measure children and active performers?
- How do you measure an entire cast without errors?
- How should you record and submit measurements to a costume maker?
- What measurement mistakes cause the worst fitting problems?
- Why should you never add ease to your own measurements?
- Toylandeu™ has costume supplies and craft kits for your next build
- Sources
- FAQ
What do you need before you measure for costumes?
Preparation cuts errors in half. Before the tape touches anyone’s body, get these four things right.
Tools. A flexible plastic or dressmaker’s sewing tape is the only tool that wraps accurately around body curves. Metal or rigid tapes distort readings on rounded surfaces. Check the tape for kinks or stretched-out sections before you start; a worn tape can read short by a quarter inch or more. Bring a pen, a full-length mirror, and a printed measurement form. If the costume includes specific performance shoes, have them on hand.
Clothing. Wear form-fitting undergarments or a leotard. Bulky layers add false inches to every circumference. Women should note which bra type they plan to wear for the costume and measure while wearing that bra, since cup size and strap style affect both bust and underbust readings.
Posture. Stand naturally with arms relaxed at your sides for all circumference measurements. Breathe normally. Pulling your shoulders back or sucking in your stomach produces measurements that belong to a different body.
Units. Pick inches or centimeters and stay there. Toylandeu™ and most U.S. workshops use inches. Switching mid-form is one of the most common causes of sizing errors in production.
Pro Tip: Write the measurer’s name and the date on every form. If a measurement looks wrong later, you know exactly who to call and when it was taken.
How do you measure each body part accurately?
The table below covers every dimension a costume maker is likely to request. For each one, the tape position and posture matter as much as the number itself.
| Measurement | Where the tape sits | Posture / notes |
|---|---|---|
| Height | Top of head to floor | Bare feet, stand against a wall |
| Chest/bust | Fullest part of the chest | Breathe normally; note bra type |
| Underbust | Directly under the bust | Tape parallel to floor |
| Waist | Natural waist (smallest point) | Use roll test to locate |
| High hip | 3–4 inches below natural waist | Tape parallel to floor |
| Fullest hip | Widest point of hips/seat | Sit test to verify comfort |
| Girth/torso | Shoulder → between legs → back | Stand straight, tape snug |
| Inseam | Crotch to floor | Bare feet or performance shoes |
| Outseam | Natural waist to floor | Side seam line |
| Back neck to waist | Nape of neck to natural waist | Stand straight |
| Shoulder width | Shoulder point to shoulder point | Across the back |
| Neck circumference | Base of neck | One finger of ease |
| Sleeve (underarm) | Underarm to wrist | Arm relaxed at side |
| Sleeve (overarm) | Shoulder point to wrist | Elbow slightly bent |
| Wrist/hand | Around widest part of hand | Thumb tucked in |
| Head circumference | Around the widest part of head | Above ears, mid-forehead |
| Waist to floor | Natural waist to floor | For skirts, dresses, capes |
| Crotch depth | Seated height from waist to chair | For unitards and jumpsuits |
Step-by-step notes for the trickier ones:
- Natural waist: Tie a cord loosely around your torso and bend side to side. The cord settles at the smallest, most defined point. That is your natural waist. The roll test is the most reliable way to find it.
- Hips: Take the reading, then sit down with the tape still in place. If the tape digs in, add a note on the form. The sit test catches hip measurements that would make sitting in costume impossible.
- Sleeves: Measure with the elbow slightly bent. A sleeve measured with a straight arm will be too short the moment the performer reaches for anything.
- Bust: Record two numbers if needed: resting and deep breath. For close-fitting fabrics like spandex, measure with the undergarments and performance shoes you plan to wear, and measure twice to confirm consistency.
- Girth/torso: Run the tape from the top of one shoulder, down through the legs, and back up to the starting shoulder. This measurement is critical for unitards, leotards, and full-body suits.
Pro Tip: For costume-specific lengths like waist-to-floor for a gown or cape length, measure from the natural waist to the floor first, then note any specific length the character requires as a separate annotation on the form.
How do you measure children and active performers?
Children move. Actors sweat. Neither will hold still for long, so the approach changes.
Measuring children works best as a two-person job: one person holds the tape, one records. Keep the session short and frame it as a game. Always record both height and weight for kids, since children’s costume sizing often uses weight as a secondary check when height alone falls between sizes. When in doubt, size up. Layering a costume over a base layer or padding requires room that a snug measurement will not provide.
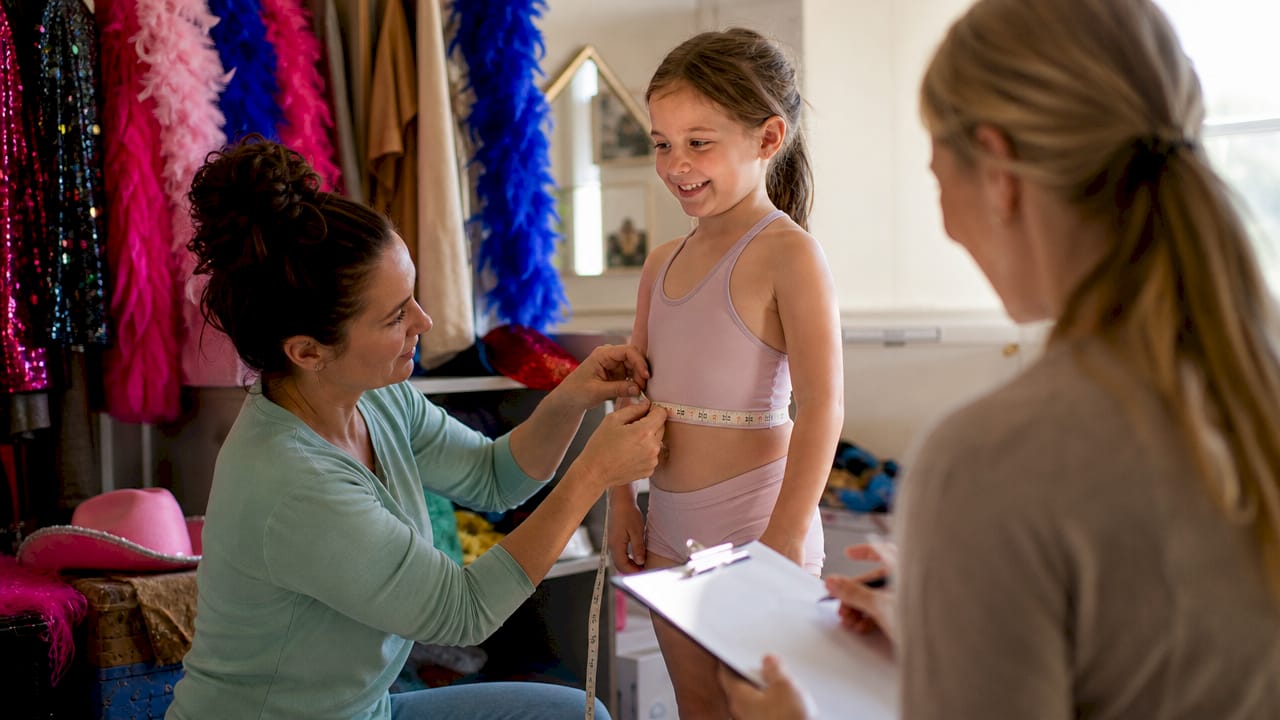
Privacy and safety matter when measuring minors. Never measure a child alone with an unrelated adult. Use a same-sex measurer when the child or parent requests one. Keep the session in a visible, shared space.
Quick-change actors need a note on the form about fastener type (magnets, velcro, snaps) and which garments layer over others. Record the order of dressing on the form itself. A performer who changes in 45 seconds cannot deal with a costume that fits only when carefully adjusted.
Performers who move a lot need functional allowances communicated as notes, not as inflated measurements. If a role requires armor, padding, or a bulky prop worn close to the body, write “requires 2-inch chest padding” in the notes field rather than adding 2 inches to the chest measurement. The costume maker needs to know the raw body measurement and the functional requirement separately.
How do you measure an entire cast without errors?
Consistency across a cast starts with one decision: assign a single trained measurer for the whole group. Productions that use one measurer reduce variation and technique errors that accumulate when multiple people take measurements in different ways.
Suggested workflow:
- Distribute a standardized printed form to every performer before the measurement session.
- Set up a private measuring station with a full-length mirror.
- Work in two-person teams: one measurer, one recorder. The recorder reads the number back aloud before writing it down.
- Measure each performer twice for chest, waist, and hips. If the two readings differ by more than half an inch, measure a third time.
- Collect all forms at the end of the session and photograph each one before filing.
- Handle late arrivals and understudies with a dedicated makeup session, not a rushed add-on.
What a complete measurement form should include:
A reliable costume measurement form captures performer name, role, production title, date, measurer name, units used, all upper- and lower-body fields, extremity measurements (head, gloves, shoes), and a notes field for quick-change needs, mobility concerns, or medical considerations.
| Form field | Why it matters |
|---|---|
| Performer name and role | Prevents mix-ups in large casts |
| Production and date | Tracks which version of measurements is current |
| Measurer name | Accountability if a number needs rechecking |
| Units (in/cm) | Prevents unit-conversion errors at the shop |
| Notes field | Captures padding, mobility, quick-change details |
How should you record and submit measurements to a costume maker?
Label every field with its unit. “36” means nothing without “inches.” This sounds obvious and gets skipped constantly.
What to include on every submission:
- Performer name and role
- Production name and opening date
- Date measurements were taken and measurer name
- Units on every single field (write “in” or “cm” in the form header and again next to any field that could be ambiguous)
- Special fit notes: padding, mobility restrictions, quick-change sequence, medical considerations
File format: Use a printable PDF for in-person fittings and an editable DOCX for remote submissions. Always send a photograph of the completed form front page as a backup.
Submission checklist:
- Measure twice for chest, waist, and hips before submitting.
- Photograph the completed form.
- Attach photos of the performer in form-fitting clothing if the maker requests them.
- Confirm receipt with the maker or rental house.
- Check whether the designer wants body measurements or finished-garment measurements. Some rental houses and designers ask for finished-garment dimensions. Always verify the designer’s instructions before submitting.
Never convert measurements yourself when submitting to an international maker. Send the number in the unit you measured and note the unit clearly.
What measurement mistakes cause the worst fitting problems?
Most fit disasters trace back to one of six errors.
- Adding ease yourself. The measurer rounds up “just to be safe” and the costume comes back two sizes too large.
- Tape not parallel to the floor. A tilted tape on the hips can read two inches short.
- Reading the wrong side of the tape. Many tapes show inches on one side and centimeters on the other. Confirm which side you are reading before every measurement.
- Measuring over bulky clothing. A hoodie adds an inch to the chest. Measure in form-fitting clothing only.
- Holding your breath. A held breath inflates the chest measurement. Breathe normally.
- Mixing units. One field in centimeters, the rest in inches, produces a form that is unusable without a full re-measure.
How to catch suspicious numbers: Re-measure immediately if a reading seems off. Compare the chest-to-waist ratio against the performer’s visible proportions. Run the verification tests: roll test for waist, sit test for hips, elbow-bent test for sleeves. For online orders, include clear notes and request a fitting mock-up or muslin if the timeline allows.
Pro Tip: When a performer has a strong preference for how a costume feels (tight, snug, or with room to move), write that preference in the notes field. Never alter the raw measurement to reflect it. The designer needs the true number to make that preference a reality.
Why should you never add ease to your own measurements?
Designers and manufacturers apply ease based on the fabric’s stretch, the garment’s construction, and the intended fit of the character. When a measurer adds inches “just in case,” the designer adds their standard ease on top of that, and the costume ends up baggy in ways that cannot be fixed without rebuilding it.
The production rule: Submit your true body measurements and let the costume maker apply the required ease for the garment. Unilaterally adding inches leads to incorrect proportions that no alteration can fully correct. This is the single most consistent guidance from professional costume shops.
The DVC Self-Measurement Sheet for Actors lists core fields including head, chest/bust, underbust, waist, high hip, hip, inseam, outseam, arm lengths, back neck to floor, height, and weight, and recommends noting the measurer and date for production records. None of those fields ask for ease. They ask for the body.
Pro Tip: If a role requires functional room (padding for armor, layers for a period silhouette), mark it as a note: “role requires 2-inch chest padding.” The maker uses that note alongside the true measurement to build the right garment.
A note from the costume room
Ill-fitting costumes are almost never a sewing problem. They are a measurement problem. The garment was built to the numbers it received, and those numbers were wrong. In a busy production, late alterations cost more time than the original fitting would have taken. A performer who cannot sit, raise their arms, or move freely in a costume is a performer who cannot do their job.
Following the checklist in this guide, specifically using a flexible tape, wearing the right undergarments, measuring twice, and submitting true numbers with units labeled, eliminates the most common causes of those problems before a single stitch is sewn. The fitting session becomes a confirmation, not a crisis.
Toylandeu™ has costume supplies and craft kits for your next build
Parents putting together a child’s costume and cosplayers sourcing accessories for a build both need the same thing: reliable products that match what they planned. Toylandeu™ carries cosplay costumes, craft kits, and creative supplies across a catalog of over 30,000 products with free worldwide shipping.

For parents who want to extend the creative fun beyond the fitting session, the Enchanting Kids Art Workbook Montessori Drawing Kit and the Creative Kids’ Colorful Drawing Scroll are both solid picks for costume sketching, prop decoration, and DIY craft projects. Browse the full Toylandeu™ catalog at Toylandeu and contact customer support directly for product fit questions or measurement guidance on any listed costume or accessory.
Sources
The following sources were used to build this guide. Each offers additional detail on specific aspects of costume measurement.
- how to take accurate measurements for dance costumes
- Costume Measurement Form | Free Template
- How to Measure for Spandex Costuming - Spandex Simplified
- The Easiest Way to Measure Yourself for Cosplays - Coscove
- Theaterish
FAQ
What measurements do you need for a costume?
Most costumes require height, chest/bust, underbust, waist, high hip, fullest hip, girth/torso, inseam, outseam, sleeve lengths, shoulder width, neck circumference, head circumference, and shoe and glove sizes. Costume-specific lengths like waist-to-floor are added for gowns and capes.
Should you add extra inches to your measurements for comfort?
No. Submit your true body measurements without adding ease. The costume maker applies ease based on the fabric, design, and intended fit; adding inches yourself results in a garment that is too large even after the designer’s standard allowances.
How do you find your natural waist for a costume?
Tie a cord loosely around your torso and bend side to side. The cord settles at the smallest, most defined point, which is your natural waist. This roll test is more reliable than estimating by feel.
How do you measure kids for Halloween or school costumes?
Use a two-person method: one person holds the tape, one records. Measure height and weight, and size up when a child falls between sizes or will wear layers underneath. Never measure a child alone with an unrelated adult.
What unit should you use when submitting costume measurements?
Use inches for U.S. productions unless the designer specifies otherwise. Pick one unit and label every field on the form. Mixing inches and centimeters on the same form is one of the most common causes of sizing errors.