

How to Use Bubble Makers for Parties and Kids' Fun
TL;DR:
- Properly prepared outdoor space and high-quality bubble solutions are essential for successful bubble play at parties.
- Following correct setup, maintenance, and homemade solution recipes ensures maximum bubble output and prolonged fun.
Getting bubble play right at a party sounds easy until the machine sputters, the bubbles pop on contact, or you’ve got soapy residue all over the living room floor. Learning how to use bubble makers properly makes the difference between five minutes of chaos and an hour of genuine delight. Whether you’re setting up an electric bubble machine for a backyard birthday party or handing a trigger-style wand to a four-year-old, this guide covers setup, technique, homemade solution recipes, and maintenance so you get maximum fun every single time.
Table of Contents
- Key takeaways
- What you need before using bubble makers
- Steps to operate bubble makers correctly
- Making your own bubble solution at home
- Troubleshooting clogs, weak bubbles, and maintenance
- My honest take on getting the most from bubble play
- Make bubble day even more creative with Toylandeu
- FAQ
Key takeaways
| Point | Details |
|---|---|
| Prep your space first | Use bubble makers outdoors whenever possible to avoid soapy mess and get better bubble dispersal. |
| Solution quality matters | A good bubble fluid, whether store-bought or homemade, affects bubble size, strength, and longevity more than the machine itself. |
| Follow step-by-step setup | Fill the tank, install batteries, and give the machine a warm-up moment before directing it at kids. |
| Clean after every use | Rinse feeding tubes and wands with warm water after play to prevent clogs and extend the life of your machine. |
| DIY solution needs rest | Letting homemade bubble solution sit for at least one hour, ideally overnight, produces noticeably stronger bubbles. |
What you need before using bubble makers
Before you press a single button, getting your materials and space ready saves you from mid-party scrambles. Bubble makers come in two main forms: electric machines that run continuously and spray thousands of bubbles hands-free, and handheld trigger-style wands that kids operate themselves. Each type has its strengths depending on the setting and age group.
Here is a quick comparison to help you decide which type fits your needs:
| Type | Best for | Power source | Bubble output |
|---|---|---|---|
| Electric bubble machine | Parties, events, outdoor display | Batteries or plug-in | Very high, continuous |
| Handheld trigger wand | Individual play, younger kids | Batteries | Moderate, on-demand |
| Traditional dip wand | Simple play, toddlers | None required | Low, manual |
Before you start, gather the following materials:
- Bubble solution (store-bought or homemade)
- Fresh batteries in the correct size for your machine
- A flat outdoor surface away from furniture and carpet
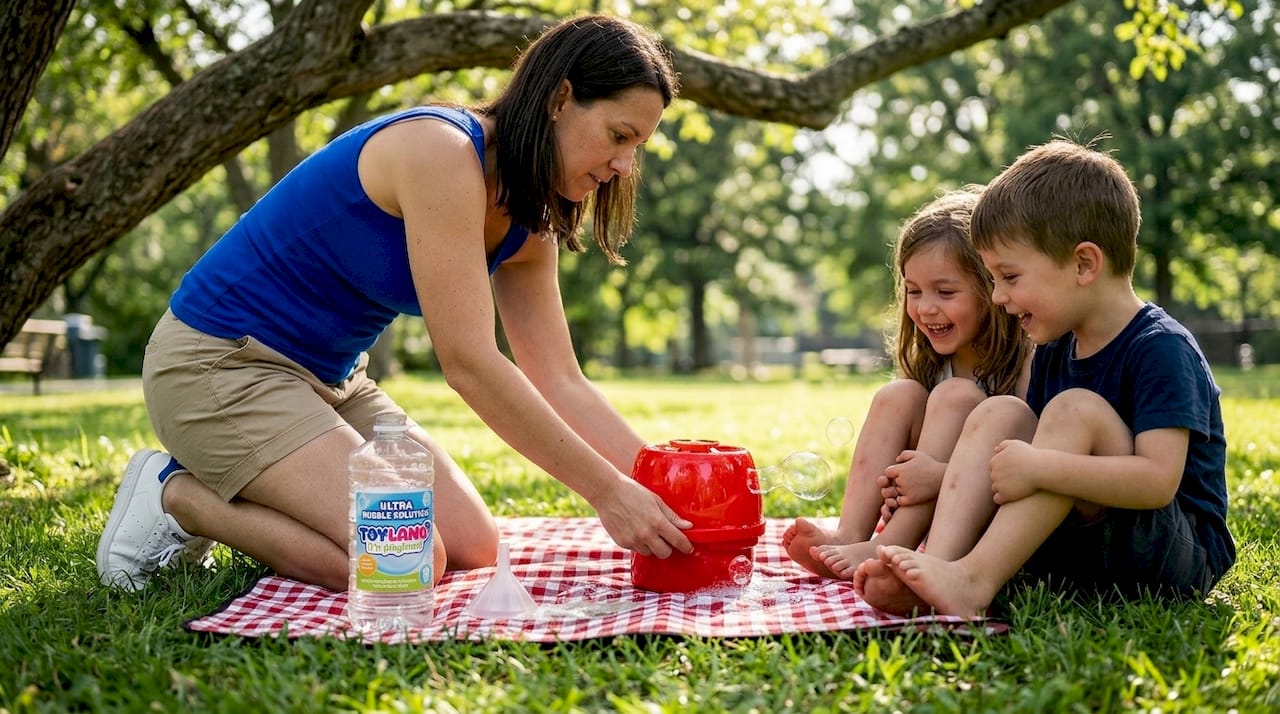
- A small container or funnel for pouring solution without spilling
- Towels or a tarp underneath the machine to catch drips
Bubble machines are best used outdoors because they release soap rapidly and produce thousands of bubbles that leave residue on indoor surfaces. Set up on grass, a patio, or any open outdoor area where kids have room to run and chase. If outdoor play is not an option, check out some engaging outdoor toys for kids for weather-flexible activity ideas.
Pro Tip: Position your electric bubble machine slightly elevated on a table or step so bubbles float outward and upward rather than landing immediately on the ground.
Steps to operate bubble makers correctly
Follow these steps for electric machines and handheld wands to get the best performance from the very first use.
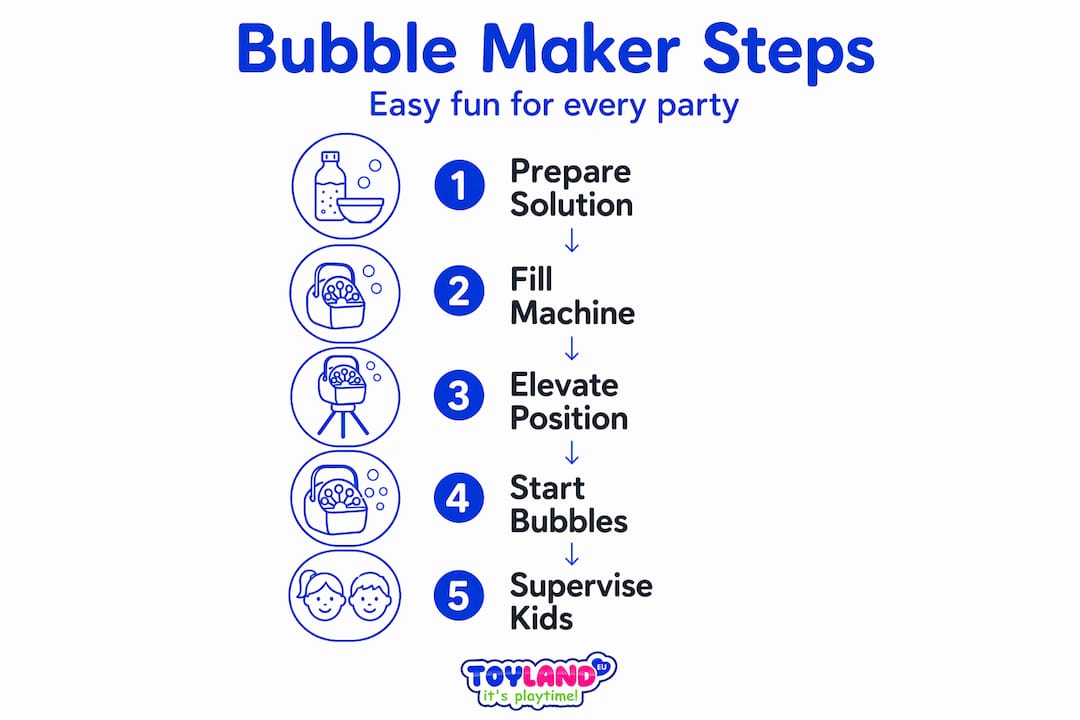
- Fill the solution tank. Open the reservoir on the electric machine and pour bubble solution to the fill line. Do not overfill. For trigger wands, unscrew the bottom chamber and add solution until it reaches the wick or sponge inside.
- Install fresh batteries. Weak batteries are the number one cause of poor bubble output. Always use new batteries at the start of a party event.
- Place the machine. Set the electric machine on a stable surface pointing in the direction you want bubbles to travel. Aim slightly into the wind rather than against it.
- Power on and wait. Switch the machine on and give it 30 to 60 seconds to prime before expecting full bubble flow. Many machines run for roughly 20 minutes before the solution runs low, so plan your refills accordingly.
- For trigger wands: Hold the unit upright, point it slightly downward, and hold the trigger for 30 seconds to allow fluid to reach the wand before expecting bubbles.
- Guide the kids. Show younger children how to hold wands upright and squeeze the trigger gently. Fast squeezing wastes solution and produces weaker bubbles.
- Refill before running dry. A machine that runs completely empty can pull air through the pump and reduce performance. Refill when you notice output dropping.
Pro Tip: Set up a small “bubble station” with a labeled bottle of solution and a funnel so older kids can refill the machine themselves. It keeps them engaged and cuts down on your refill trips.
Making your own bubble solution at home
Homemade bubble solution often outperforms cheap store-bought fluid, and it costs almost nothing to make. The key ingredients are dish soap, water, and a thickener like glycerin or corn syrup.
Here is a reliable recipe for a one-liter batch:
| Ingredient | Amount | Purpose |
|---|---|---|
| Distilled or tap water | 700ml | Base of the solution |
| Dish soap (gentle formula) | 300ml | Creates the bubble film |
| Glycerin or corn syrup | 2 tablespoons | Strengthens and extends bubble life |
Solutions with corn syrup or glycerin produce bubbles that hold their shape significantly longer than plain soap and water. For kids with sensitive skin, choose a fragrance-free dish soap without added moisturizers.
When mixing, follow these steps:
- Combine water and glycerin first, then add dish soap last
- Stir slowly and gently using a spoon rather than a whisk
- Stop stirring the moment ingredients are combined
Over-stirring creates foam that reduces the effectiveness of the soap film, which directly hurts bubble quality. After mixing, cover the container and let it rest. Resting the solution overnight produces noticeably stronger and longer-lasting bubbles compared to using it immediately.
Pro Tip: Make your batch the night before the party. Store it in a sealed jar at room temperature and give it a single gentle stir before pouring into the machine.
Troubleshooting clogs, weak bubbles, and maintenance
Even good machines run into problems. Here is how to diagnose and fix the most common issues before they ruin the fun.
- Bubbles popping immediately: This usually means the solution is too thin or too foamy. Mix a fresh batch, let it rest, and check that glycerin is included.
- Machine running but no bubbles forming: The wand or mesh may be clogged with dried soap. Remove it and soak in warm water for five minutes.
- Trigger wand not flowing: Soak the feeding tube in warm water for five minutes, then hold the trigger for two minutes over a sink to flush any blockage.
- Weak output from electric machine: Check the batteries first. Then check that the solution reservoir has enough fluid and that the motor fan is spinning freely.
- Gunk building up inside: Residue left after play reduces performance significantly over time. Always rinse the tank and wand with plain warm water after every session.
Clean your bubble maker after every single use. A two-minute rinse immediately after play takes almost no effort and prevents the kind of hardened soap buildup that can permanently block a wand or feeding tube.
When handling the battery compartment, keep it dry and never expose it to soapy water. If a machine gets wet internally, remove the batteries immediately and let it air dry before trying to run it again. For more guidance on safe operation of battery-powered outdoor toys, Toylandeu has a practical electric toy safety guide worth reading before the event.
My honest take on getting the most from bubble play
I’ve watched a lot of parents invest in expensive electric bubble machines and then set them up with the cheap fluid that came in the box. The machine looks impressive, the kids get excited, and within ten minutes the bubbles are barely forming and everyone’s frustrated. The machine is not the problem. The solution is.
In my experience, the single biggest upgrade you can make is mixing your own fluid the night before. Spending three dollars on a bottle of glycerin and using it in a homemade batch beats any pre-packaged solution I’ve tried. Add to that a clean machine with fresh batteries, and you will get results that genuinely impress.
The other thing I have learned is that involving kids in the setup builds excitement before a single bubble floats. Let them measure the soap, pour the water, and gently stir the mix. By the time the machine turns on, they are already invested. Combine bubble makers with other outdoor water toys and you have the makings of an afternoon that kids will talk about for weeks.
— Thane
Make bubble day even more creative with Toylandeu
Bubble play is just the start of a great party activity lineup. If you want to keep kids engaged before and after the bubbles come out, Toylandeu has a fantastic selection of hands-on creative kits that pair perfectly with outdoor sensory play. The Montessori Drawing Kit gives kids a structured creative outlet between outdoor activities, and the 24-Color Clay Modeling Kit keeps little hands busy with satisfying tactile play. Both ship worldwide with free delivery. Browse the full range at Toylandeu to build your ultimate party activity bundle.
FAQ
How do you fill a bubble machine with solution?
Open the reservoir lid or panel and pour bubble solution directly into the tank up to the marked fill line. Use a funnel to avoid spills, and never overfill, as excess liquid can leak into the motor housing.
How long does a bubble machine run before refilling?
Most electric bubble machines run for approximately 20 minutes before the solution runs low. Keep a bottle of backup solution nearby so you can refill quickly without interrupting the fun.
What is the best homemade bubble solution recipe?
Mix 700ml of water, 300ml of gentle dish soap, and 2 tablespoons of glycerin. Stir gently to avoid foam and let the mixture rest for at least one hour before using. Overnight resting produces the strongest results.
Why do my bubbles keep popping right away?
Instant-popping bubbles usually indicate the solution is too thin, too foamy from over-mixing, or has dried out inside the wand. Mix a fresh batch with glycerin and soak any clogged wand parts in warm water before retrying.
How do you clean a bubble maker after use?
Rinse the solution tank and wand with plain warm water immediately after play. For trigger-style units, soak the feeding tube in warm water for five minutes and run clean water through it to flush soap residue before storing.