

How to Fly a Kite: Tips for Beginners and Families
TL;DR:
- Learning to fly a kite involves selecting the right gear and flying in open, steady-wind locations. Proper assembly, gentle launching, and small adjustments help prevent crashes and promote control. Kite flying offers calming mindfulness, family-inclusive fun, and easy skill-building for all ages.
There’s nothing more defeating than watching a kite nose-dive into the ground three seconds after launch. If you’ve been there, you’re not alone. Learning how to fly a kite is one of those outdoor skills that looks effortless from a distance but has a few critical details that make all the difference. This guide covers everything you need: choosing the right kite, reading the wind, launching correctly, controlling flight, and landing without damage. Whether you’re heading to the park solo or making it a family afternoon, you’ll leave here ready to actually enjoy it.
Table of Contents
- Key takeaways
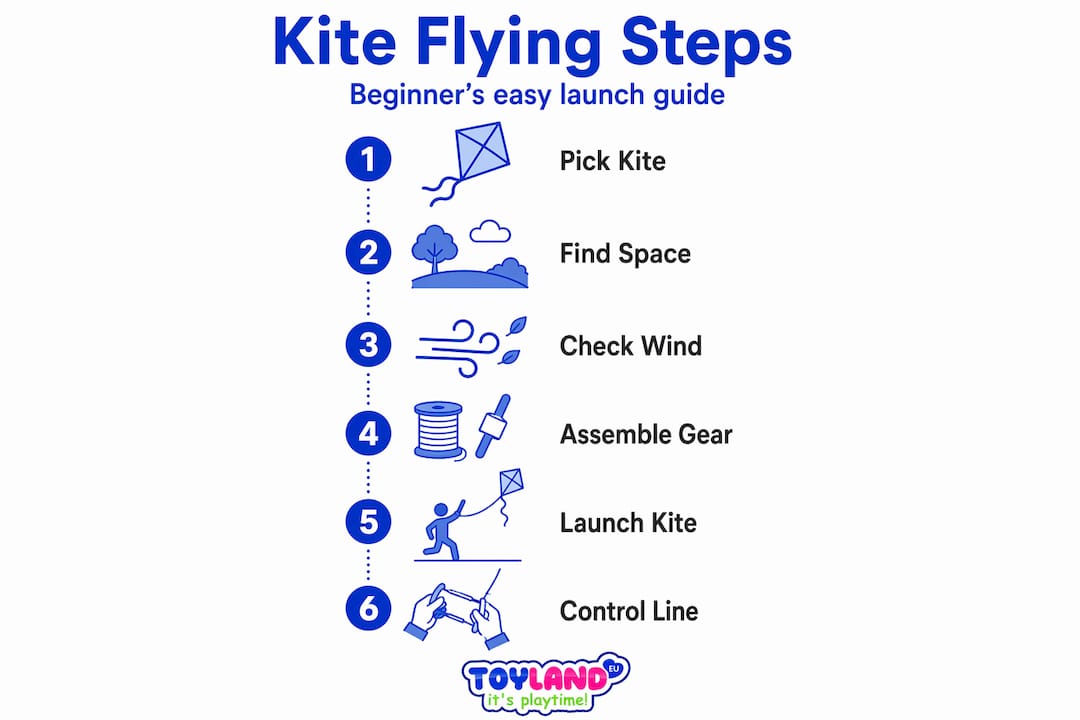
- How to fly a kite: choosing the right gear and spot
- Assembling your kite and getting ready to launch
- Launching, controlling, and troubleshooting your flight
- Landing your kite safely and storing it well
- My take on why kite flying is worth your time
- Explore more outdoor fun with Toylandeu
- FAQ
Key takeaways
| Point | Details |
|---|---|
| Wind speed matters most | Aim for 5 to 15 mph wind; too little means no lift, too much means crashes. |
| Diamond kites are best for beginners | Simple diamond kites with tails offer the most stable flight in moderate winds. |
| Launch without running | Stand with your back to the wind and release gently; running usually causes instability. |
| Line length is often overlooked | Unspool at least 30 to 100 feet of line so the kite reaches steadier air at altitude. |
| Small corrections beat constant pulling | Gentle tugs maintain lift; aggressive pulling wastes energy and destabilizes flight. |
How to fly a kite: choosing the right gear and spot
Before you even leave the house, two decisions shape your entire session: which kite you pick and where you fly it.
Picking the right kite
Not all kites are created equal, especially for beginners. Diamond kites with tails perform best for newcomers in moderate winds because the tail acts as a natural stabilizer. Box kites and delta kites are also forgiving, though they typically need slightly stronger and steadier wind to stay up reliably. Parafoil kites (the ones without rigid frames) are compact and portable, but they demand more skill to launch and control.
Here’s a quick comparison to help you decide:
| Kite type | Best wind range | Skill level | Key benefit |
|---|---|---|---|
| Diamond with tail | 8 to 15 mph | Beginner | Very stable, easy to assemble |
| Delta | 6 to 20 mph | Beginner to intermediate | Wide wind range, self-correcting |
| Box kite | 10 to 20 mph | Intermediate | Lifts well, visually striking |
| Parafoil | 12 to 25 mph | Advanced | No frame to break, ultra-portable |
When choosing kite size, stick to something between 20 and 36 inches for your first few sessions. Larger kites pull harder and become difficult to manage, especially for kids. Look for ripstop nylon or polyester fabric, which holds its shape better than plastic film kites sold in discount bins.
Finding the right location
Open spaces are non-negotiable. Flying a kite in a park with plenty of room is ideal: think large fields, beaches, or hilltops with consistent airflow. Stay at least 100 feet away from trees, power lines, and buildings. Turbulent air created by obstacles is one of the top reasons kites spin and crash even when the wind seems fine.
Check your weather app before heading out. The ideal wind speed for beginners is 5 to 15 mph. Winds below 5 mph simply won’t generate enough lift. Winds above 20 mph can snap a line, tear fabric, or pull a child off balance. A light flag rippling steadily or leaves rustling gently signals perfect flying conditions.
Assembling your kite and getting ready to launch
Proper setup takes five minutes and prevents 90% of beginner problems. Follow these steps before you even think about lifting the kite off the ground.
- Lay the kite flat on the ground and check that the frame rods are seated firmly in their connectors. A loose rod throws off the kite’s shape and kills stability.
- Attach the tail securely to the bottom of the kite. Tails add drag that keeps the kite level; a missing or too-short tail is why many diamond kites spin uncontrollably.
- Check the bridle. Most beginner kites come pre-tied with a balanced bridle, and you should leave it exactly as it is. Untying and re-tying the bridle is the most common mistake that turns a good kite into a spinning disaster.
- Attach your flying line to the bridle loop with a secure knot, such as a lark’s head knot. Tug firmly before flying to confirm it won’t slip.
- Unspool your line to at least 30 to 100 feet before launch. This is the step most beginners skip. Short line keeps the kite in turbulent, low-altitude air where it can’t stabilize.
- Hold your spool like a doorknob, not flat like a steering wheel. This grip prevents line twist and gives you far better control when adjusting tension.
Pro Tip: Never tie your kite line to a fixed object like a tree or fence post. Always hold the spool or wrap it loosely so you can release line quickly if a sudden gust hits. This one habit prevents both equipment damage and physical injury.
Launching, controlling, and troubleshooting your flight
This is where the fun actually starts, and where most people go wrong.
How to launch a kite
Stand with your back to the wind and hold the kite up at arm’s length so the wind catches its face. Don’t throw it or run forward. Simply let go gently while keeping light tension on the line. The kite should rise on its own. Walk slowly backward while letting line out steadily to help it climb higher into steadier air.

If you have a helper, have them hold the kite about 50 feet downwind while you hold the spool. When you signal, they release the kite and you maintain tension. This method is the most reliable launch for any wind condition.
Controlling the kite in the air
Once the kite is up, the goal is small, confident adjustments rather than constant movement. Balanced tension with minor corrections keeps the kite steady. Pulling hard and frequently wastes your energy and introduces wobble.
To gain altitude, give the line a few short, quick tugs upward, similar to snapping a towel. Then let the line out slightly. The kite climbs. To descend, slowly reel in line. To let the kite drift further out, feed line smoothly.
Fixing common problems fast
| Problem | Likely cause | Fix |
|---|---|---|
| Kite spins in circles | Tail too short or missing | Add more tail length |
| Kite dives to one side | Bridle off-center | Adjust the bridle attachment point slightly |
| Kite won’t lift off | Wind too low or line too short | Wait for a gust, unspool more line |
| Line tangles | Spool held flat, line slack | Keep tension on line at all times |
| Kite jerks and bobs | You’re running excessively | Stop moving, use small tugs instead |
Pro Tip: If your kite starts to dive and you’re running out of options, walk toward it quickly to release line tension. This often gives the kite just enough slack to right itself before hitting the ground.
Landing your kite safely and storing it well
A good landing protects your kite and keeps everyone around you safe. Here’s how to bring it down the right way.
- Reel in line slowly and evenly. Don’t rush. Pulling too fast causes the kite to swoop toward you or the ground at speed.
- Walk toward the kite as you reel in. This keeps the line from going slack and tangling around feet or obstacles.
- Guide the descent with small pulls. As the kite gets close to the ground, use gentle tugs to keep it angled away from trees and people.
- Catch the kite by its frame, not the fabric, to avoid tearing. Have a second person ready to grab it if the wind is still active.
- Wipe down and store properly. Remove the frame rods, coil the line neatly, and store everything in a bag away from heat and moisture. UV exposure and humidity are what degrade kite fabric fastest.
My take on why kite flying is worth your time
I’ve watched families arrive at a park with a brand-new kite, fumble for twenty minutes, and then pack it up frustrated. That’s a shame, because they were almost always one or two small adjustments away from having a genuinely great afternoon. Kite flying supports mindfulness in a way that’s hard to replicate with most outdoor activities. You have to pay attention to the wind, the line tension, and the kite’s position all at once. That focused presence is exactly what makes it so calming.
What I appreciate most is the age range it covers. From toddlers to seniors, there’s a version of kite flying that works. A toddler can hold the spool on a calm day with a small stable kite. A teenager can work toward stunt kites and tricks. A grandparent can sit nearby and still feel connected to the whole experience. Not many outdoor activities offer that. The learning curve is real, but it’s short. Once you understand wind and line tension, everything else clicks.
— Thane
Explore more outdoor fun with Toylandeu
If kite flying has you excited about getting outside more, Toylandeu has a full selection of outdoor toys built for exactly that energy.

Once the kite is packed up, the fun doesn’t have to stop. Toylandeu’s gesture-controlled stunt car is a crowd favorite for open-space play, with 360-degree spins and intuitive hand-motion controls that kids and adults both love. For families who want to check age-appropriate picks before buying, the toy gift checklist on Toylandeu’s blog is a genuinely helpful starting point. With free worldwide shipping and over 30,000 products, finding the right next outdoor activity is easy.
FAQ
What wind speed is best for flying a kite?
Most beginner kites fly best in winds between 5 and 15 mph. Below 5 mph, there isn’t enough lift; above 20 mph, the kite becomes hard to control and risks damage.
What are the best kites for beginners?
Diamond kites with tails are the top recommendation for beginners because they are stable in moderate winds and easy to assemble. Delta kites are also beginner-friendly and tolerate a wider range of wind conditions.
How do I launch a kite without a helper?
Stand with your back to the wind, hold the kite at arm’s length so the wind catches it, and release gently while maintaining light tension on the line. Slowly walk backward while letting out line to help it gain altitude.
Why does my kite keep spinning or crashing?
A spinning kite almost always means the tail is too short or missing entirely. A kite that dives repeatedly usually has a bridle that needs slight recentering. Both are quick fixes that take less than two minutes.
Is kite flying safe for young children?
Yes, with appropriate supervision and a size-appropriate kite. Keep young children away from power lines, roads, and large crowds. Always hold the spool rather than tying it off, so the line can be released quickly if needed. For more on safe toy choices for kids, Toylandeu’s parent guide covers the key considerations.
Recommended
- Best Summer Activities for Families and Individuals – ToylandEU
- The Ultimate Guide to Outdoor Water Toys for Kids: Benefits, Safety Ti – ToylandEU
- RC Flying Bird Toy Drone - Remote Control Fun for Kids & Adults Outdoors ToylandEU
- RC Ultimate Beginner’s RC Glider 76102s - Fly High with Ease! ToylandEU